A gallery wall is one of the fastest ways to give any room personality, warmth, and a designer-level focal point — without a renovation budget. Whether you’re working with a blank wall above the sofa, an awkward stairwell, or a narrow hallway that needs life, the right gallery wall ideas can turn dead space into a conversation piece.
In this guide, you’ll get 25 curated gallery wall ideas, step-by-step layout methods, framing and budget tips, and a plan you can actually execute this weekend. By the end, you’ll know exactly which style fits your home, how to hang frames evenly (no more measuring nightmares), and where to source affordable art — whether you own your home or are renting and need renter-friendly options.
Why Create a Gallery Wall?
Gallery walls solve real design problems. They personalize a generic space, fill awkward or oversized walls, and create a focal point without requiring a large single piece of art that costs a fortune. They’re also one of the most cost-effective ways to add visual impact: a thoughtfully curated collection of $5 thrift-store frames and printable art can outshine a $500 canvas.
For renters, gallery walls are especially appealing. Using removable hanging strips, picture ledges, or leaning frames against the wall, you can create a bold picture wall without losing your deposit. They also grow with you — swap prints, add souvenirs from trips, or rotate seasonal artwork without starting from scratch.
Gallery Wall Styles and Themes
Before you pick up a hammer, choose a style. The layout and frame choices below are the foundation of every great gallery wall design.
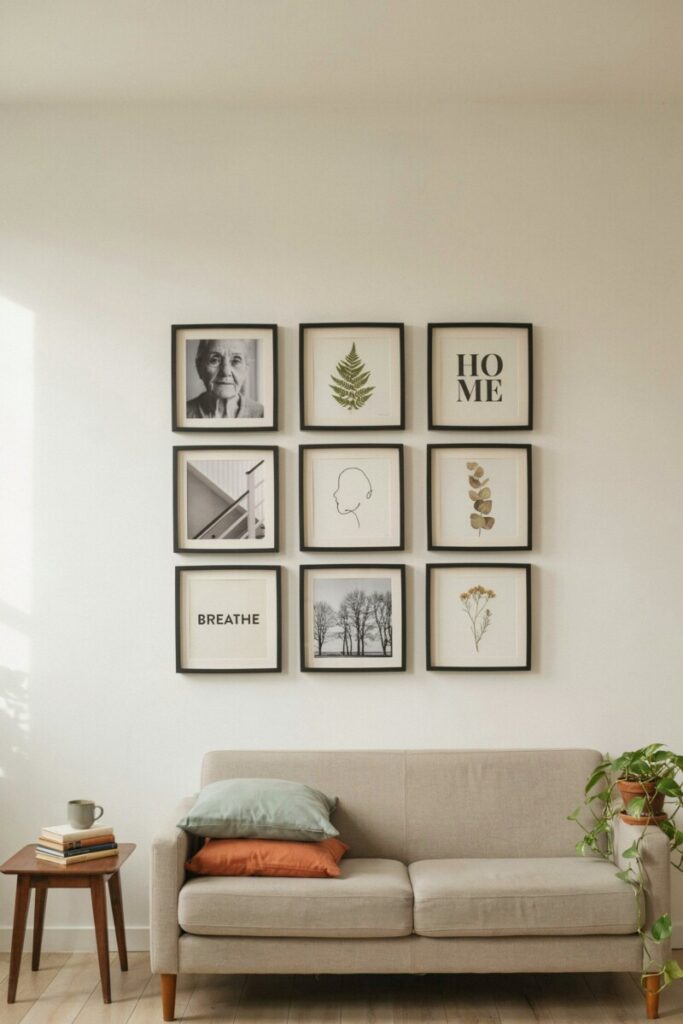
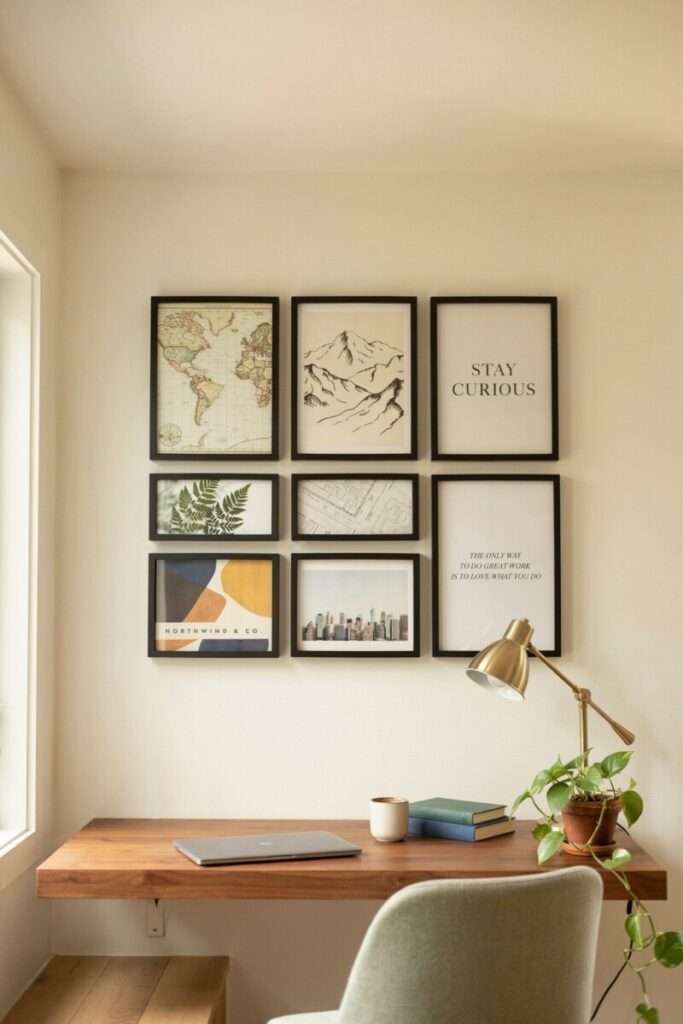
Cohesive Grid Layout
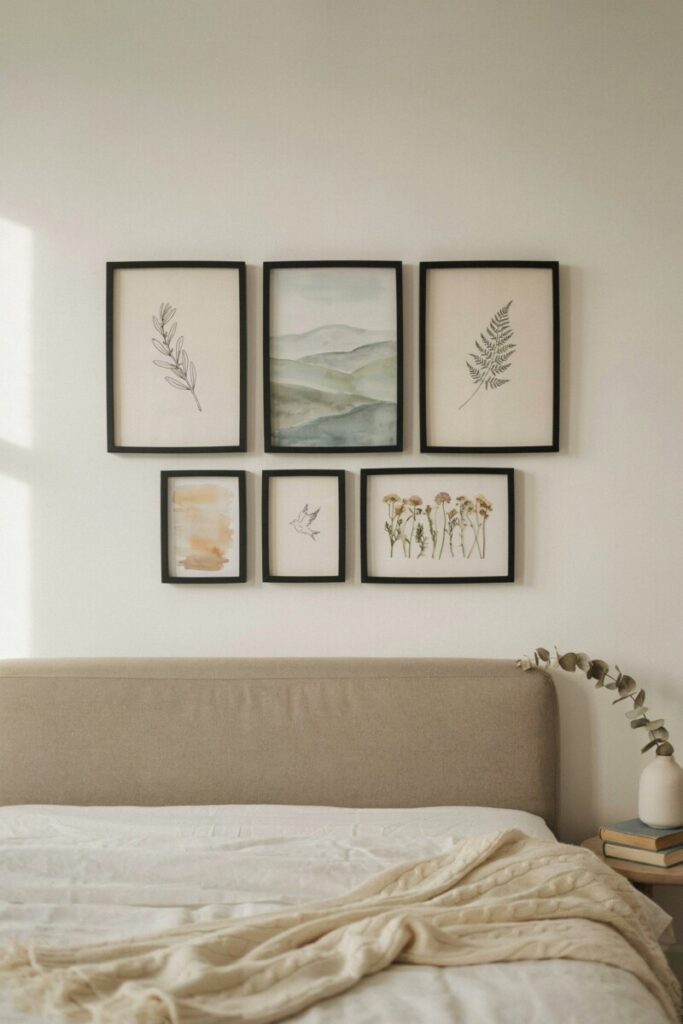
A cohesive grid uses matching frames hung in even rows and columns. It’s clean, modern, and perfect for a modern gallery wall above a sofa or in a home office. Works beautifully with black-and-white photography, botanical prints, or typographic art.
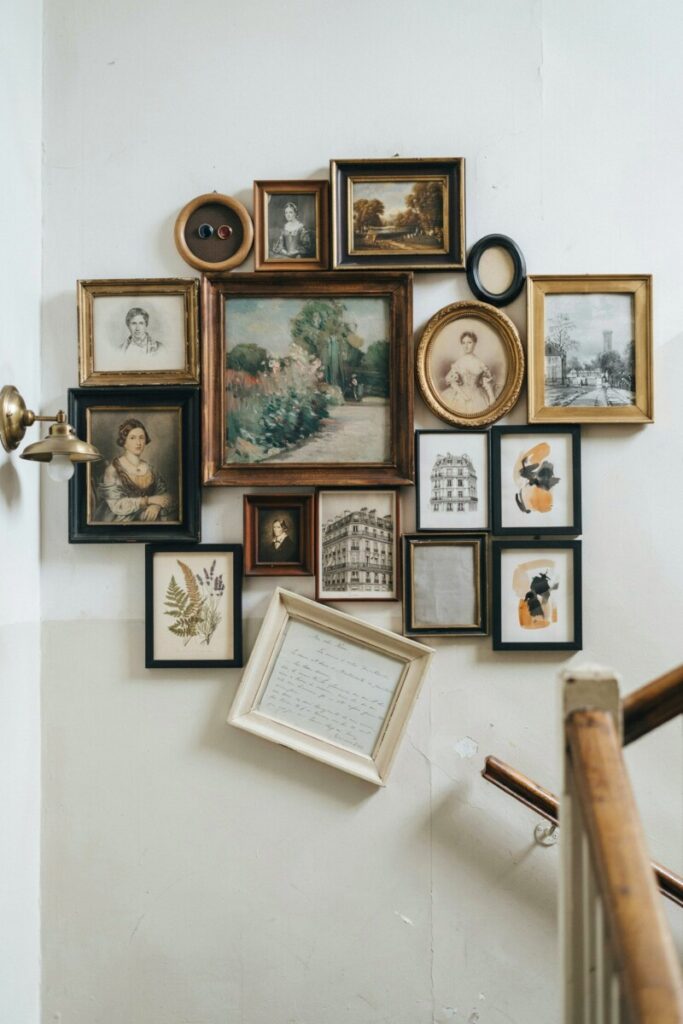
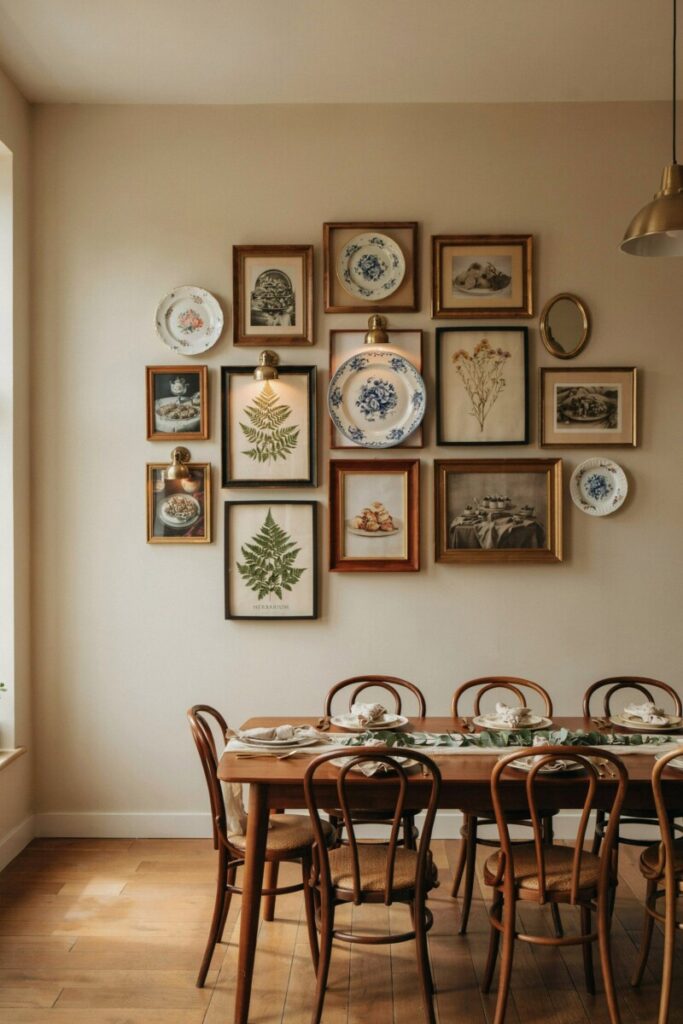
Salon Style (Eclectic Gallery Wall)
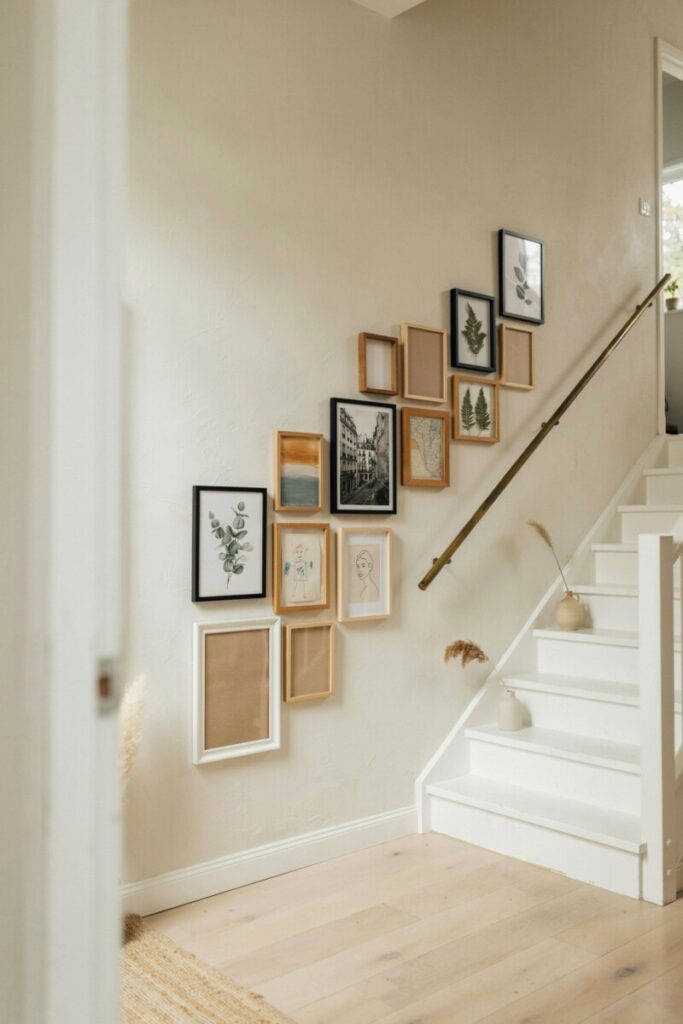
Inspired by 19th-century Parisian salons, the salon wall packs frames of varying sizes close together in an organic, layered arrangement. This eclectic gallery wall style thrives in stairwells, dining rooms, and reading nooks. Mix metals, woods, and art styles for a collected-over-time feel.
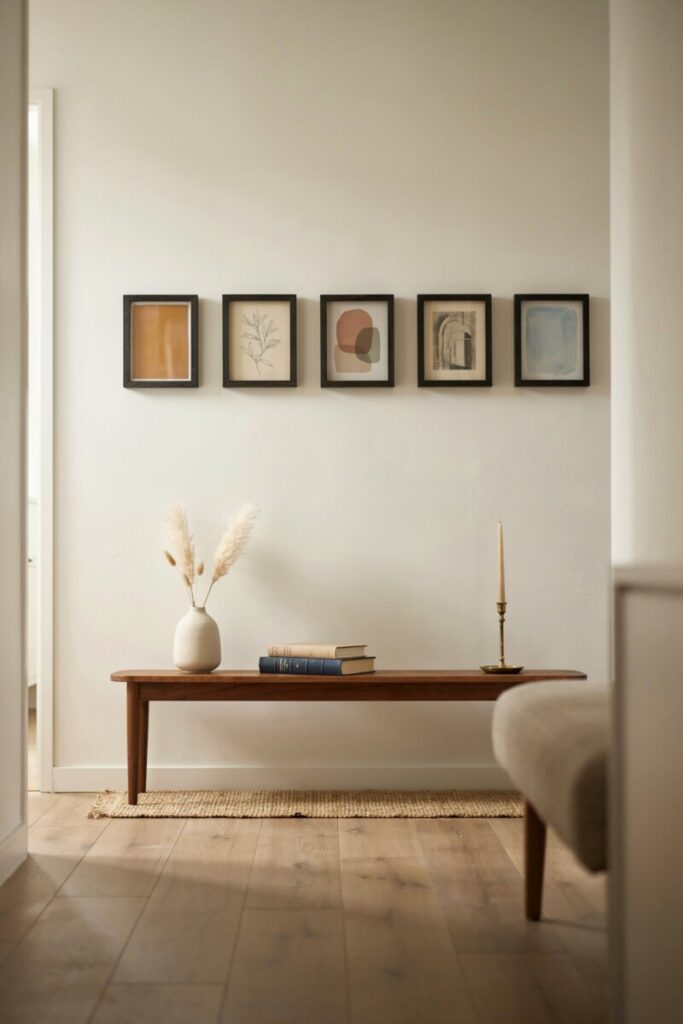
Linear Row
A single horizontal row of frames, usually the same size, hung at the same height. Ideal for hallways, above kitchen banquets, or a gallery wall for staircase landings where vertical space is limited.
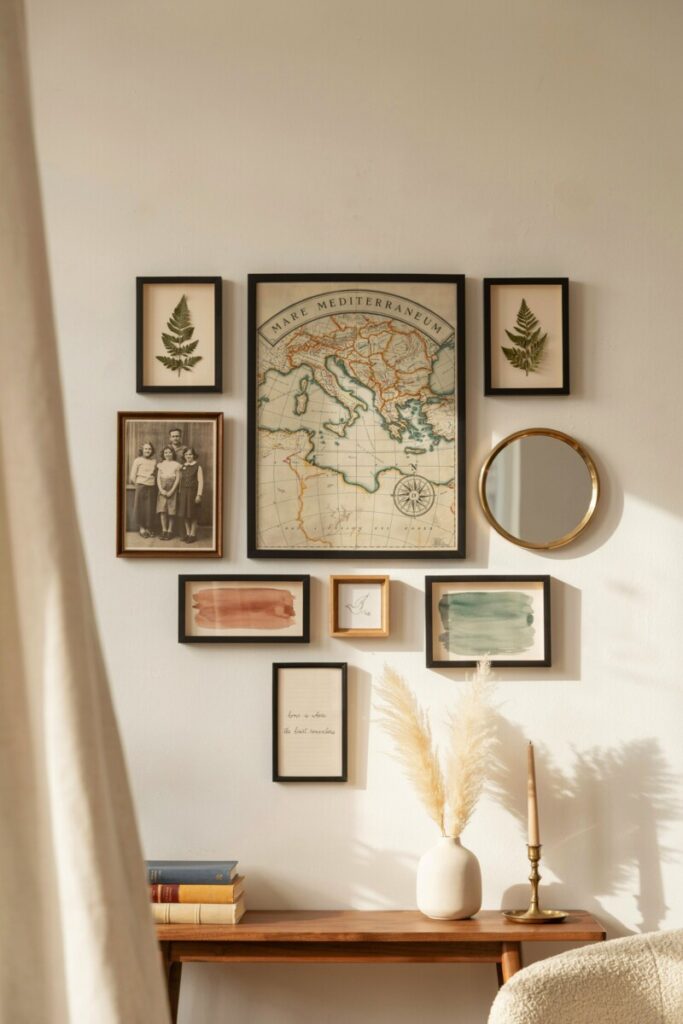
Centered Anchor Piece
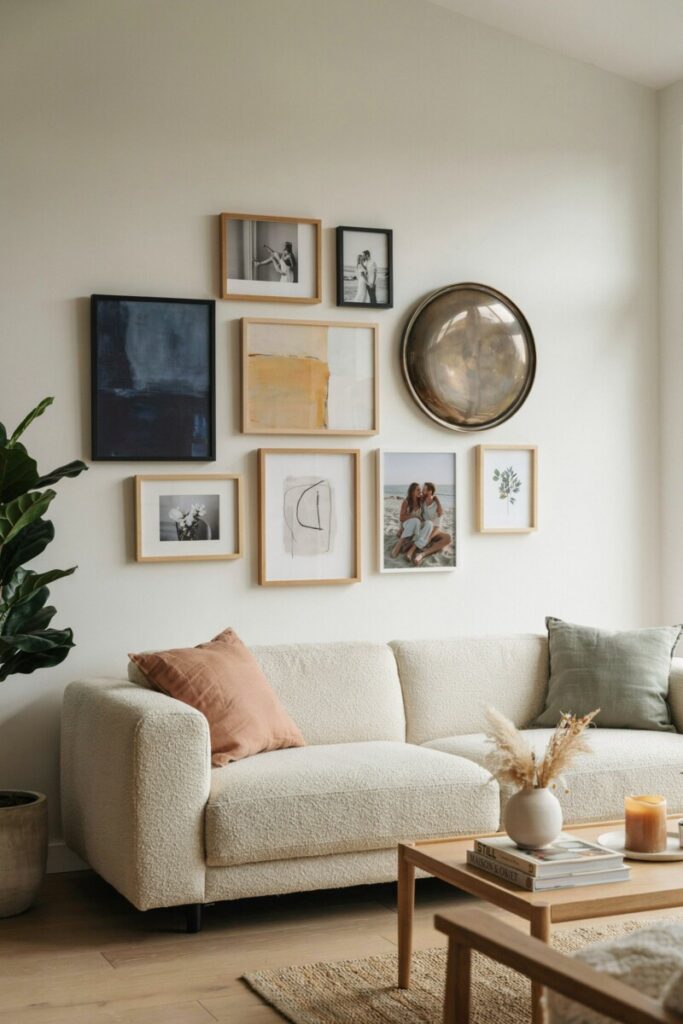
Start with one oversized piece — a vintage map, large mirror, or statement painting — and build smaller frames around it. This gallery wall arrangement gives a clear focal point and works well in living rooms and bedrooms.
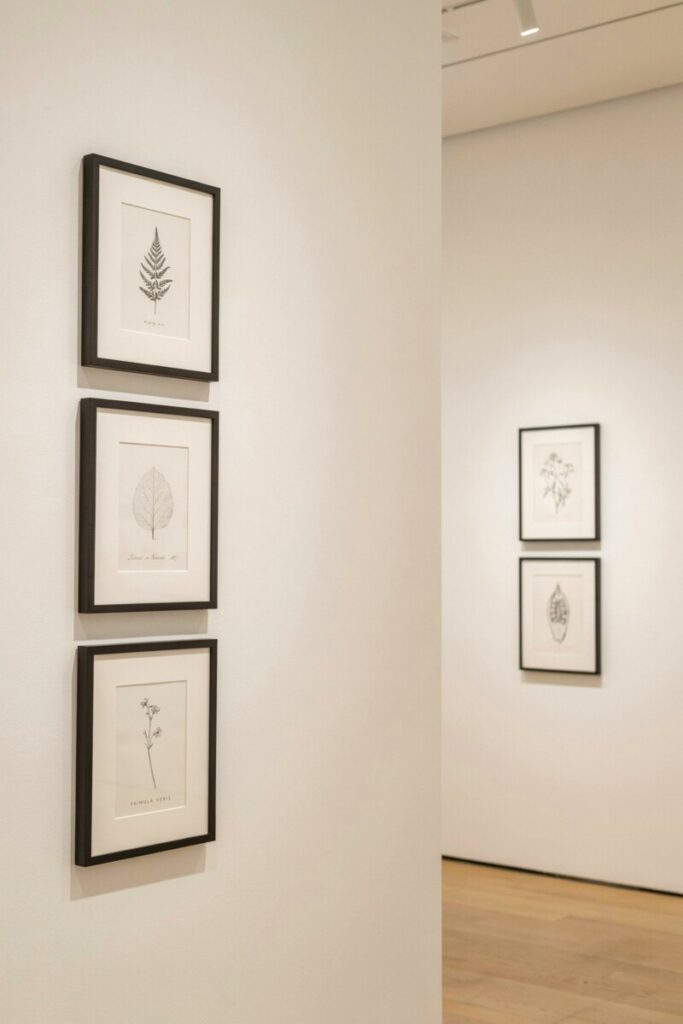
Monochrome and Minimalist
Stick to one color family: all black frames with white mats, or all natural wood with neutral art. A minimalist gallery wall reads as high-end and suits small apartments and Scandinavian-style rooms.

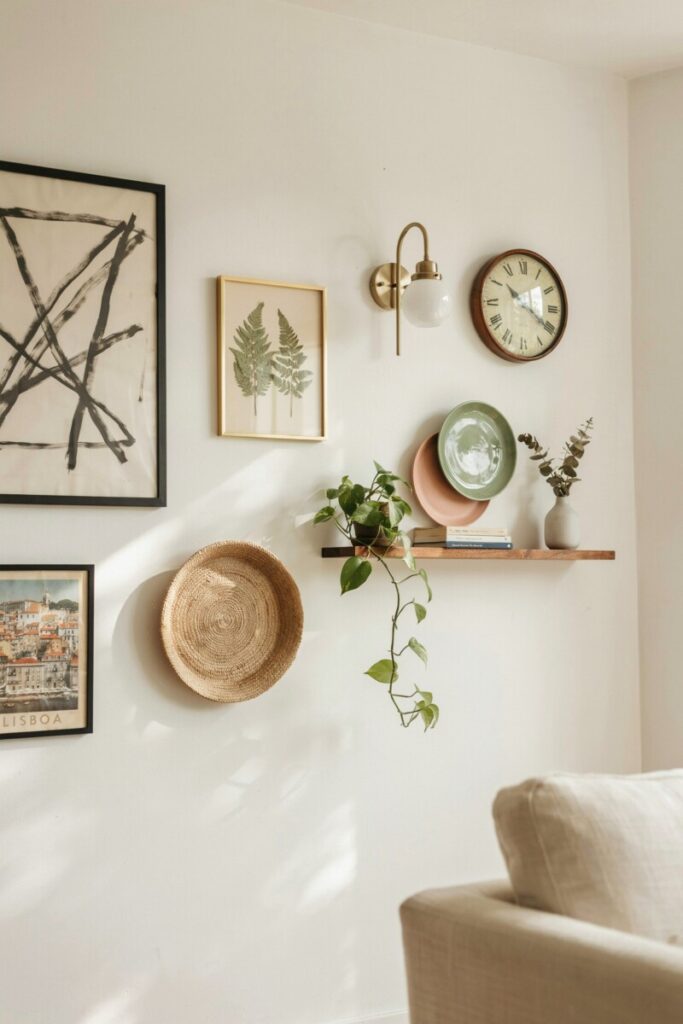
Mixed-Media Gallery Wall
Combine framed art with 3D objects: woven baskets, ceramic plates, sconces, floating shelves with plants, or a vintage clock. This approach adds texture and depth that flat prints alone can’t achieve.
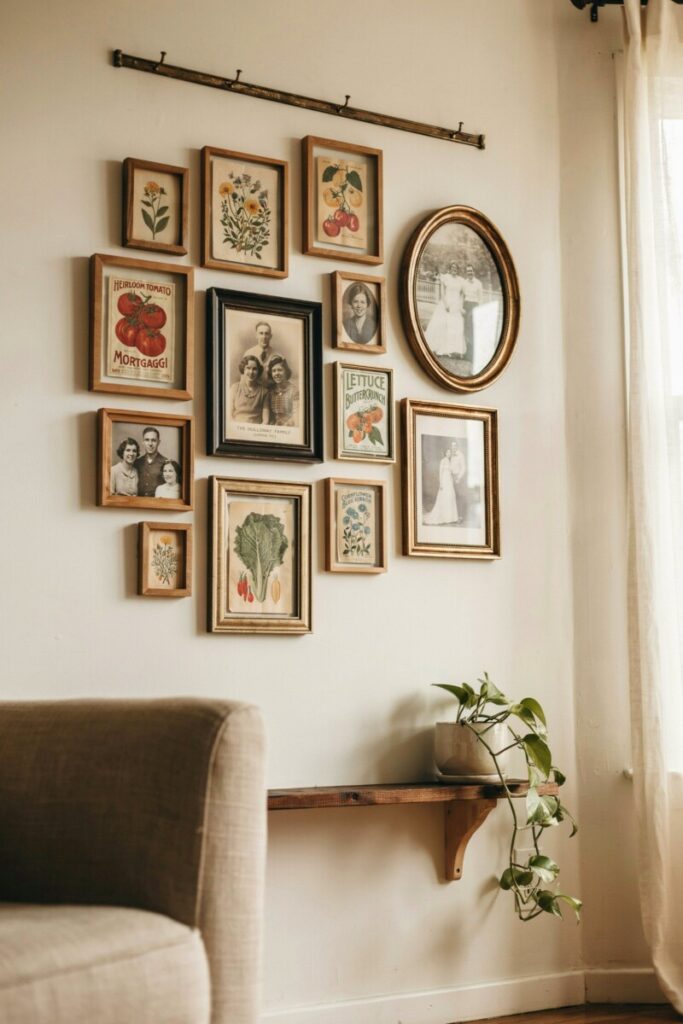
Themed Collections
Curate around a story: a farmhouse gallery wall of vintage seed packets and family photos, a travel wall with maps and postcards, or a kids’ art gallery with rotating school projects in colorful frames.
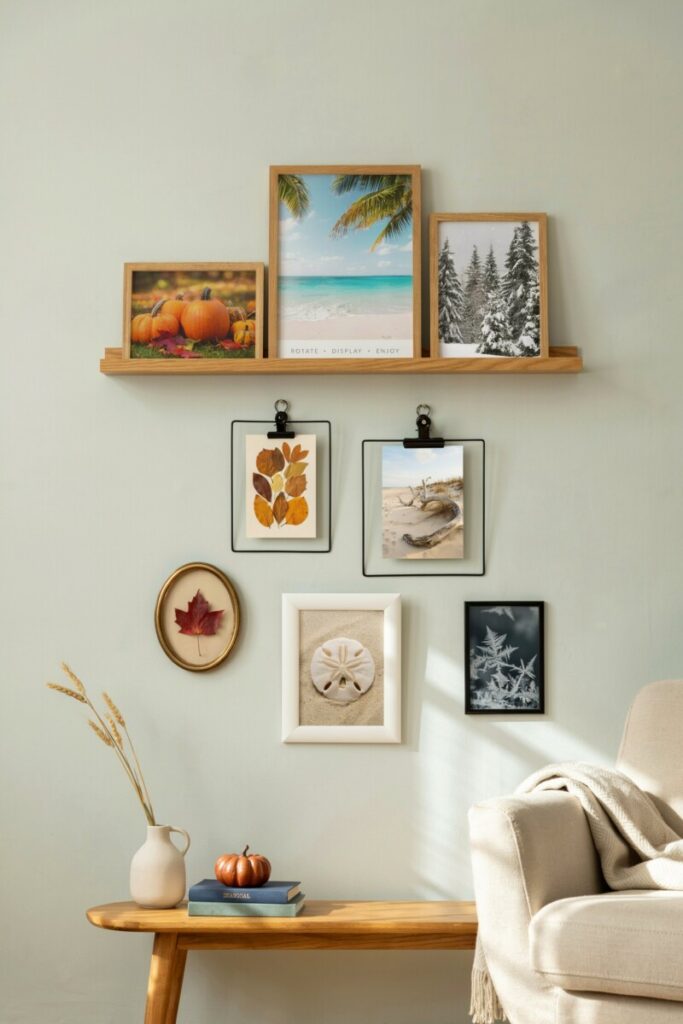
Seasonal or Rotating Gallery
Use picture ledges or clip frames so you can swap art with the seasons — pumpkins in fall, beachscapes in summer — without rehanging hardware every few months.
Room-by-Room Gallery Wall Ideas
Gallery Wall Ideas for Living Room
The living room is the gallery wall’s natural home. Try an anchor piece layout above the sofa with the center of the arrangement roughly 6–8 inches above the couch back. Mix abstract art, one oversized mirror, and a single personal photo for balance. For narrow living rooms, a linear row along the longest wall draws the eye and makes the space feel wider.
Gallery Wall Ideas for Bedroom
Above the headboard is prime real estate. Go symmetrical with two matching large frames flanking a central piece, or try a softer salon-style cluster of calming landscapes, line drawings, or botanical illustrations. Keep color palettes muted to support rest.
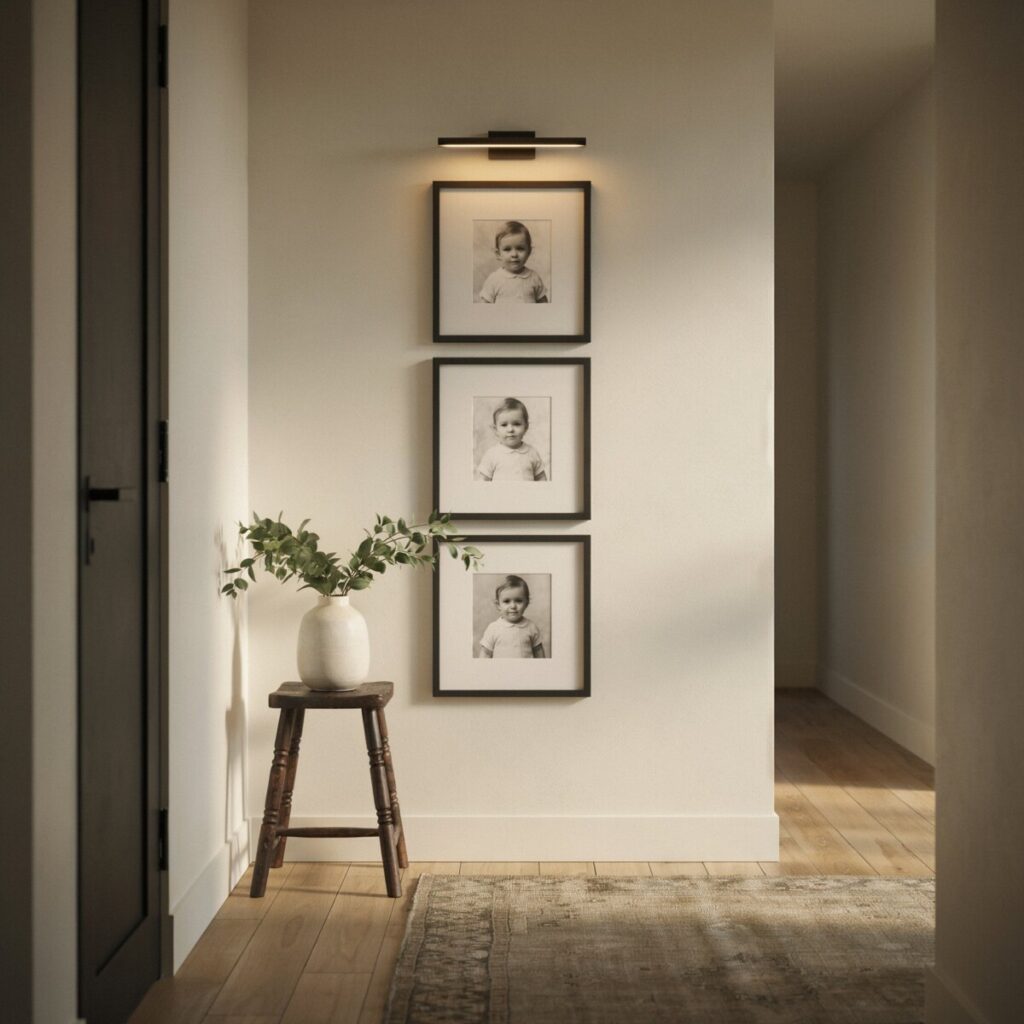
Hallway and Gallery Wall for Staircase
Stairwells beg for a gallery wall for staircase that follows the angle of the stairs — keep the center line of frames parallel to the stair slope. In flat hallways, a linear row at eye level (about 57 inches from the floor) prevents that museum-too-high look.
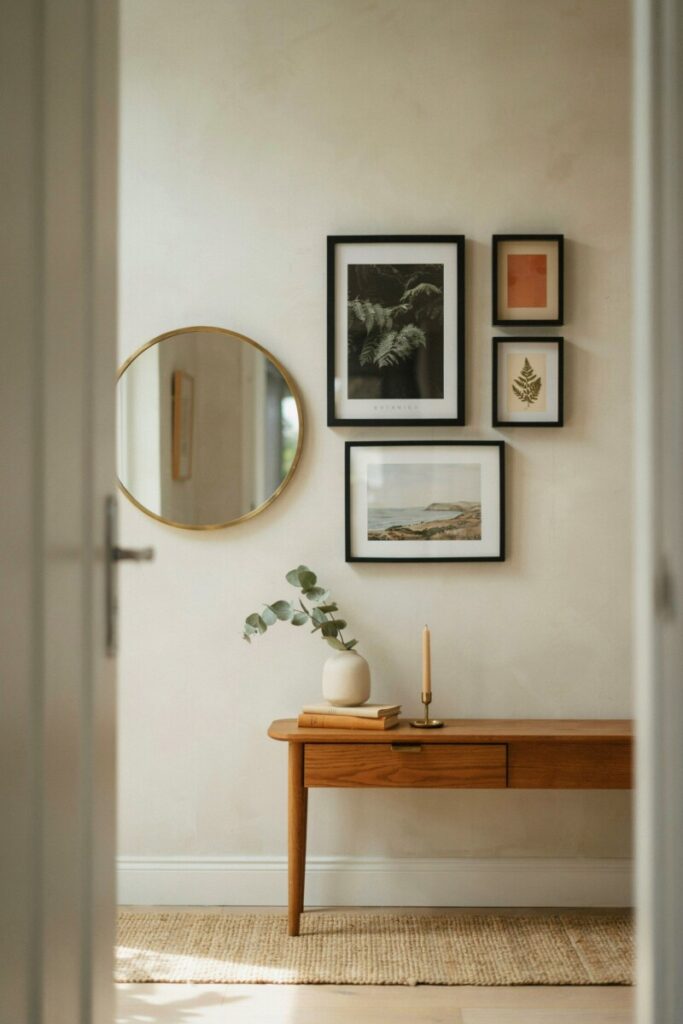
Entryway
First impressions matter. A small, bold gallery wall ideas for small spaces arrangement — three to five frames with one statement piece — next to a console table creates welcome. Add a small mirror for function.
Dining Room
A salon wall of vintage plates, botanical prints, or food photography adds warmth. Keep the gallery centered on the wall behind the dining table so it frames the space when guests are seated.
Home Office
Choose a cohesive grid of motivational typography, maps, or industry-relevant imagery. Uniform frames reduce visual clutter so you can focus.
Nursery and Kids’ Room
Frame children’s art, alphabet posters, or soft watercolor animals. Use gallery wall frames in playful colors and swap pieces as they grow. Clip frames make rotating artwork effortless.
How to Plan and Lay Out Your Gallery Wall
Knowing how to hang a gallery wall properly separates a polished feature wall from a crooked mess. Follow this step-by-step method.
Step 1: Choose Your Wall and Focal Point
Identify the wall and decide what anchors it — a large frame, a mirror, or the center point of a grid. Everything else radiates from this decision.
Step 2: Measure and Map
Measure the wall’s width and height. A good gallery wall spacing rule: leave 2–4 inches between frames in tight groupings, 6–8 inches in larger rooms for breathing room.
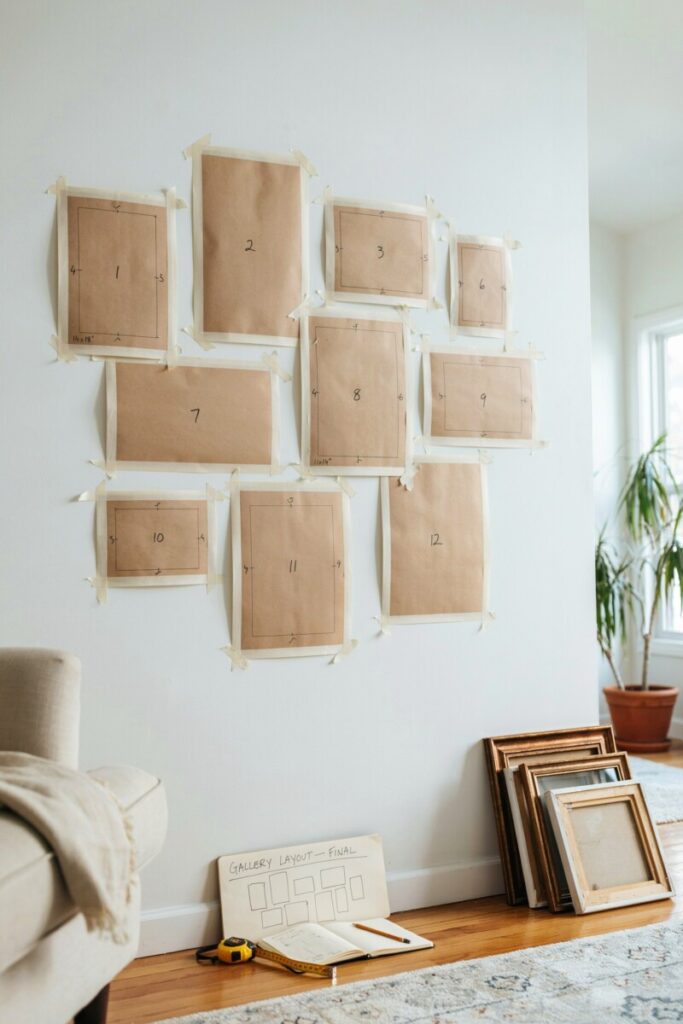
Step 3: Create Paper Templates
Trace every frame onto kraft paper or newspaper, cut them out, and tape them to the wall with painter’s tape. Rearrange until the gallery wall arrangement feels balanced before you make a single hole.
Step 4: Establish the Center Line
Hang the center of your arrangement at eye level — roughly 57–60 inches from the floor for standing spaces. Above seating, lower the center line so it relates to the furniture, not to the standing viewer.
Step 5: Use the Right Hardware
For drywall, picture-hanging hooks rated for your frame weight are the gold standard. For renters, heavy-duty Command strips and adhesive hooks work up to about 16 pounds per strip. For heavier pieces, consider a gallery rail system — a single track mounted near the ceiling with hanging wires you can adjust freely.
Step 6: Hang, Level, and Step Back
Use a level (or a laser level for large walls) after every few frames. Step back frequently — it’s easier to adjust now than to patch holes later.
Tools and Materials Checklist:
- Measuring tape, pencil, level (or laser level)
- Hammer and picture-hanging hooks (rated to frame weight)
- Command strips or adhesive hooks (renter-friendly)
- Kraft paper, painter’s tape, scissors (for gallery wall templates)
- Optional: picture rail system, picture ledges, clip frames
💡 Quick tip: Use kraft paper templates taped to the wall to test every layout before committing. Mark hook locations directly on the paper, then hammer through — no extra holes, no guesswork.
Framing, Matting, and Print Tips
Gallery wall frames make or break cohesion. Matching frames (all black, all natural oak, all brass) read as intentional and gallery-like. Mixed frames read as collected and eclectic — but only if you vary size and style deliberately, not randomly.
Mat widths create visual weight. Wide white mats (3–4 inches) around small prints elevate them to fine-art status and unify mismatched pieces. Narrow or no mats work for photos and posters.
Frameless options — canvases, acrylic-mounted prints, or clipboards — add texture to mixed-media walls.
Where to Source Affordable Art
- Print shops: Major online print labs offer museum-quality giclée prints starting around $15 for standard sizes.
- Digital downloads: Etsy and independent artists sell downloadable files you print locally — huge affordable gallery wall hack.
- Local artists: Art school grad shows and community markets often sell originals under $100.
- DIY printing: Use your home printer for 8×10 photos on premium paper and frame behind glass.
💡 Quick tip: For sun-exposed walls, invest in UV-filtering glass or acrylic to prevent fading — especially for sentimental photos and signed prints.
Budget and Shopping Suggestions
You can build a stunning gallery wall at every price point:
- Low-budget (under $75): Thrift stores are goldmines for mismatched frames — spray-paint them all one color for instant cohesion. Pair with free printable art or postcards.
- Mid-range ($75–$300): IKEA, Target, and West Elm offer solid gallery wall frames in standard US sizes (8×10, 11×14, 16×20). Combine with posters from online print shops.
- Splurge ($300+): Custom framing for heirloom pieces, original artwork from local artists, or museum-grade archival prints.
DIY gallery wall ideas: Paint thrifted frames a single bold color, frame fabric swatches or wallpaper samples, hang decorative plates with plate hangers, or create “frames” entirely from washi tape directly on the wall around unframed prints.
💡 Quick tip: Buy frames one size larger than your print and add a mat — it’s cheaper than custom framing and looks dramatically more expensive.
Common Mistakes and Troubleshooting
Even experienced decorators hit a few snags. Here are the most common gallery wall tips for dodging them:
Mistake 1: No anchor piece. Too many small pieces floating with no visual priority creates chaos. Add one large frame or mirror to ground the arrangement.
Mistake 2: Inconsistent spacing. Eyeball measurements look sloppy. Use a scrap of cardboard cut to your desired gap as a spacer between every frame.
Mistake 3: Hanging too high. The classic error. Remember: 57–60 inches from floor to center of the arrangement — or lower above seating.
Mistake 4: Ignoring room scale. A tiny gallery on a giant wall looks lost. A massive salon wall in a powder room overwhelms. Match the gallery to the room.
Mistake 5: Crowding outlets and switches. Leave at least 4 inches of clearance around light switches, thermostats, and outlets for both function and visual breathing room.
Quick fixes: For crooked frames, stick a small museum wax or Command dot on the bottom corners. For frames that shift with humidity, use two hooks instead of one. For uneven spacing after the fact, a leaning art ledge below the gallery hides gaps beautifully.
💡 Quick tip: Photograph your wall before hanging anything. Mark frame positions in a photo editor to preview the layout digitally before committing to holes.
Conclusion: Pick a Wall and Start
The best gallery wall ideas are the ones you actually build. Pick one wall, choose a style that fits your room, map it with paper templates, and hang your first frame this weekend. You’ll be surprised how quickly a blank wall becomes the favorite part of your home.
Ready to get started? Download our free printable gallery wall templates (PDF with 12 pre-sized layouts for standard US frames), browse our curated list of affordable frame and print resources, and share your before-and-after photos in the comments or tag us on social — we’d love to see what you create.
💡 Quick tip: Start small. A three-frame cluster above a desk lets you practice layout, spacing, and hanging technique before tackling the big living room wall.